Interactive Tutorials for Midjourney
Getting started
First step: the prompt…
Let's start with something simple: Type the subject of your image. If nothing comes to your
mind, try
You need to have a prompt…
The variants…
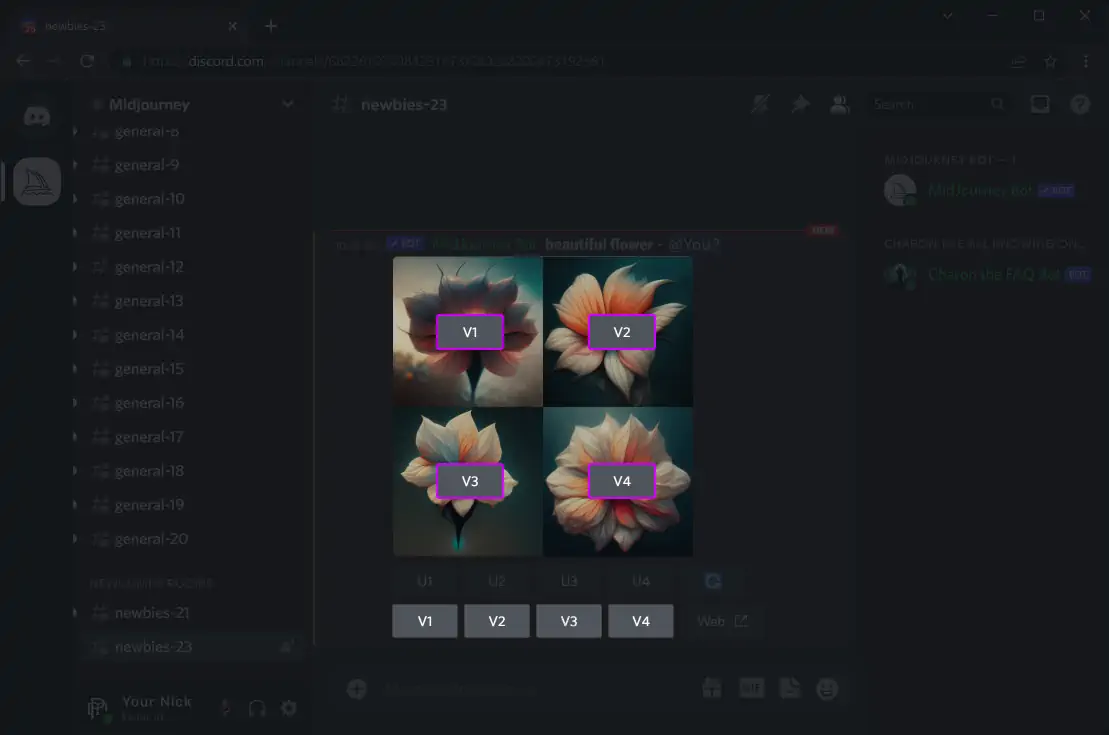
Select the image closest to your idea, then create variants from it.
They are
numbered as follows:
V1 top-left,
V2
top-right,
V3
bottom-left, and
V4 bottom-right.
If you don't like any of the images, try changing your prompt, or generating four new ones with
the refresh button.

Upscale!
You can repeat the previous two steps as often as you wish, but eventually, you'll get a
variant you fell in love with.
This is the time for upscaling, which will add
more detail and render the image in higher resolution.
The button numbering follows a pattern similar to variants:
U1 top-left,
U2
top-right,
U3
bottom-left, and
U4 bottom-right.

You can cancel the upscaling
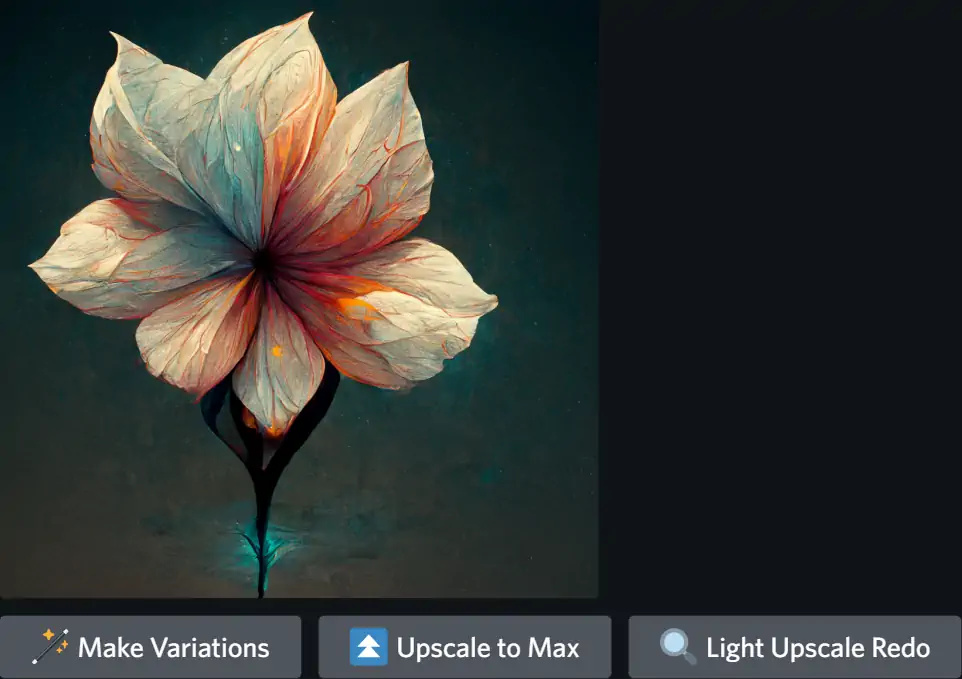
any time, but if you let it complete, you will see three new buttons:
Make Variations
will create new variants from the upscaled image
Upscale to Max
will upscale it to the maximum resolution, adding even more detail, but this will consume
fast hours. However, if you are a free trial user, you only have 25 minutes of fast GPU
time, so use it wisely.
Light Upscale Redo
will recreate the upscale but with less detail.
Congratulations, you have completed your first
Midjourney tutorial on promptoMANIA!
Your reward is an awesome AI generated image. You can click on the image to open it to full
size, and then right-click and choose Save image to save
it to your computer. If you're on mobile, you can tap the image and then tap the download icon
in the top right
corner.
What's next?
If there is a demand from the patrons, I will continue to add interactive tutorials on more advanced topics.
Today you can continue with bit-sized-tips
or
full tutorials
on how to use Midjourney and promptoMANIA.
You can continue to the full-featured
prompt builder
and explore it for yourself.